
CONNECT TO AZURE SQL SERVER THROUGH ODBC
Connect and start scheduling
More and more companies run their database in the cloud with Azure SQL Server. To start using AutoSQL with your Azure database, you need to have connectivity to the server and setup authentication. Microsoft recommends to only accept Microsoft Entra user authentication and not to use user credentials. This article describes how to setup a specific service principal in Entra for AutoSQL.
Step 1: Create a service principal for AutoSQL in Microsoft Entra
Go to Microsoft Entra and click on ‘App registrations’.
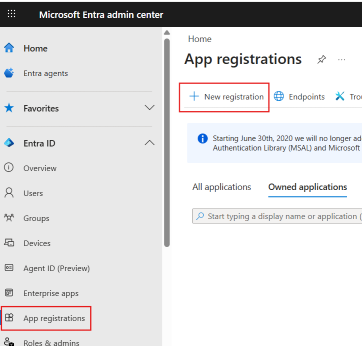
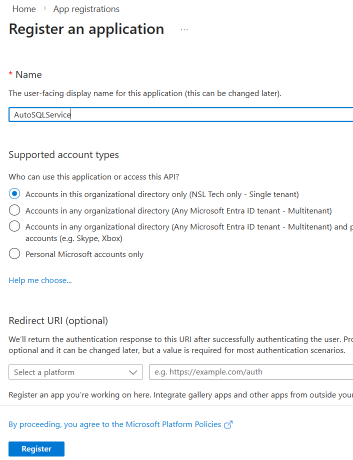
Create a new app called ‘AutoSQLService’. This can be single tennant and you don’t need to specify any redirection URIs:
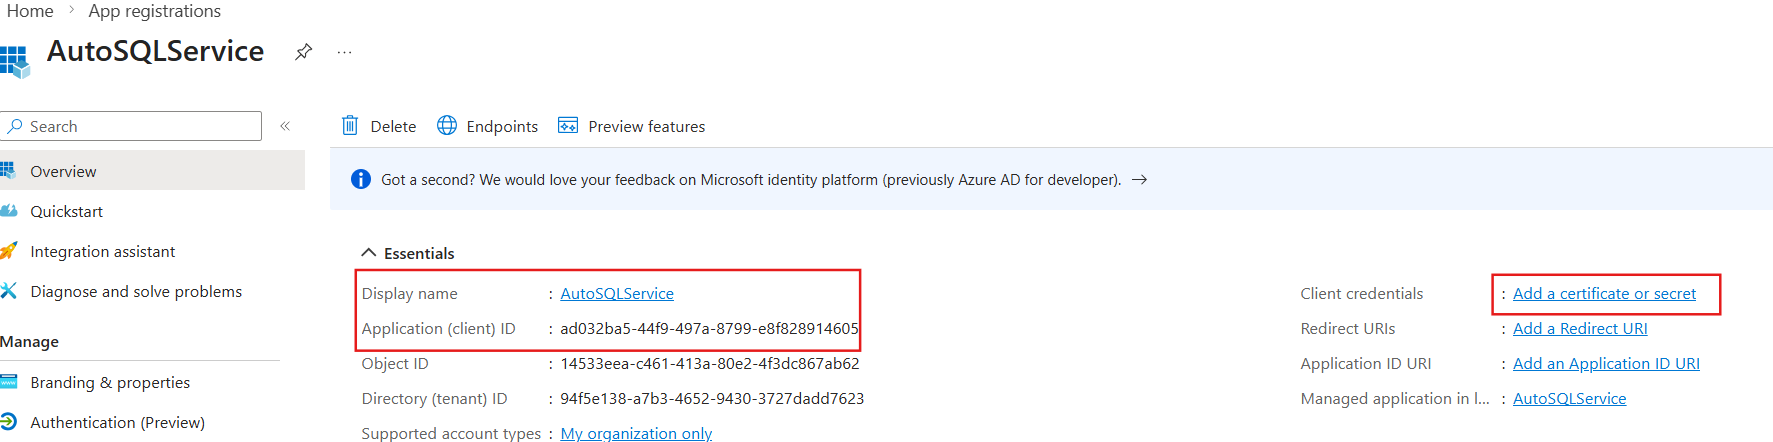
After the creation you will see all the details of the registered app. Write down the following information already for later usage:
- Application (client) ID, in this case: ad032ba5-44f9-497a-8799-e8f828914605
- The displayname: AutoSQLService
Now click on ‘Add a certificate or secret’:
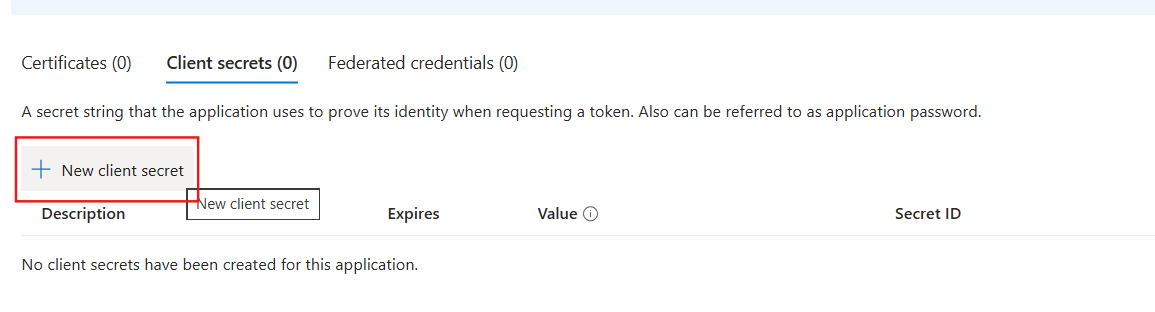
In the ‘Client secrets (0)’ tab, click ‘+ New client secret’:
Give the secret a name and choose an expiration time. Be aware that you will have to create a new one once the secret is expired:
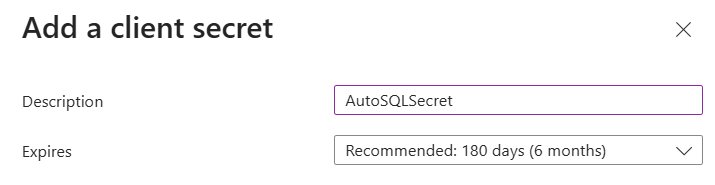
Now that the secret is created, you need to save the ‘Value’. This is only shown after creation and can never be retrieved again. If you loose it, you need to create a new one:

You now have all the information we need from Entra:
- Display Name of the registered app
- The application / client ID
- The secret
The application ID will be used as a username, and the secret as a password. The display name is needed to create a user in the SQL server itself. This is explained further in the next step.
Map the service principal to a SQL Server user
With the app registration from Entra you would already be able to authenticate to the SQL Server. However, it will throw you the following error: ‘Login failed for user ‘<token-identified principal>’.
This means you can authenticate as a valid user, but you are not known to the database itself. Therefore we first need to create a user in SQL Server itself. To do this, please login to your database and execute the following query:
CREATE LOGIN [AutoSQLService] FROM EXTERNAL PROVIDER
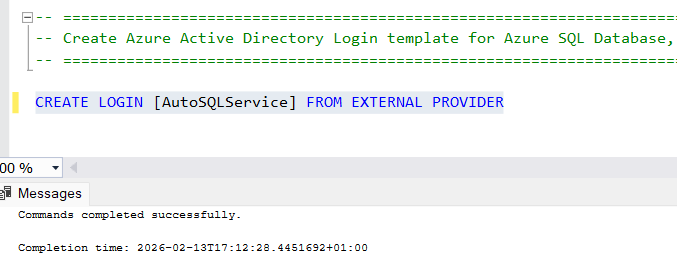
Now that we have the LOGIN created, we also need to create the USER in the database that we want to query and assign the ‘db_datareader’ role. You can do this with the following SQL:
CREATE USER [AutoSQLService] FROM EXTERNAL PROVIDER;
ALTER ROLE db_datareader ADD MEMBER [AutoSQLService];
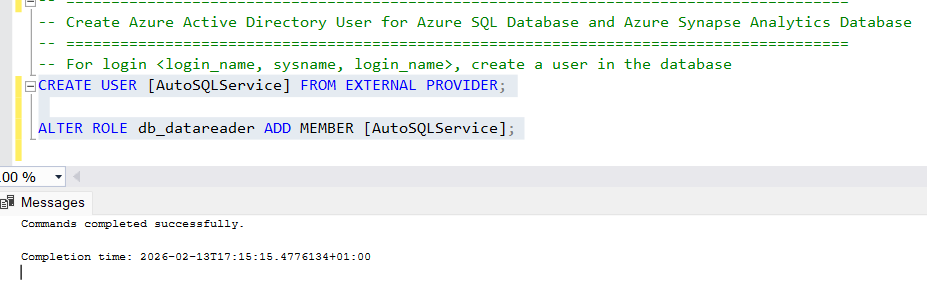
Now everything is setup on the Azure side to get AutoSQL connected!
Setup the connection in AutoSQL
If you did not download and install AutoSQL yet, this is the first step:
The easiest way to get a connection string is to build it from the relevant driver. The installed drivers are listed like below. For Azure SQL Server you need to use the SQL Server driver version 18 or higher:
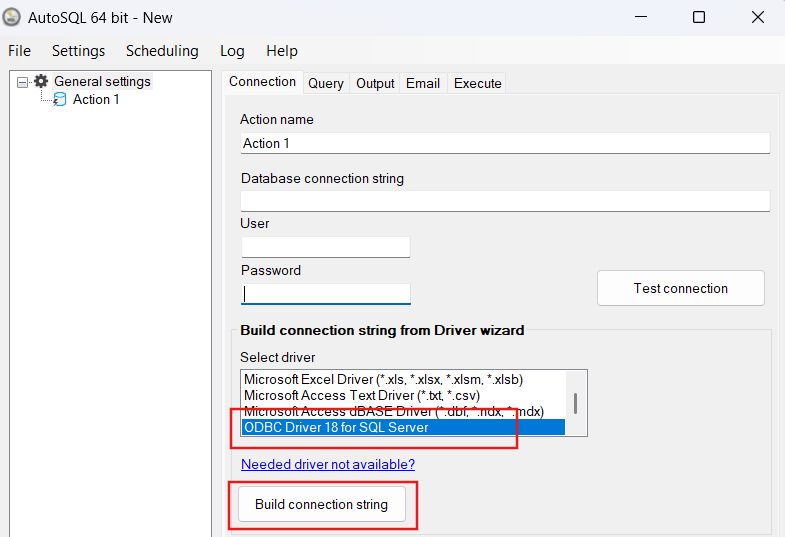
When you click ‘Build connection string’ you will first be asked for the server address.

1. You can find this on the Azure Portal at the SQL server resource if you don't have it yet.
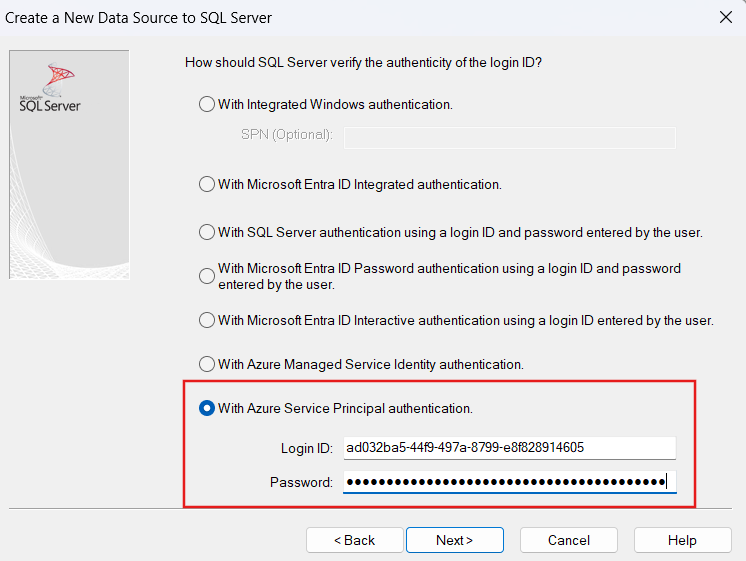
2. Choose here 'With Azure Service Principal authentication'. Use the application ID as 'Login ID' and the value of the secret you saved earlier as the 'Password'
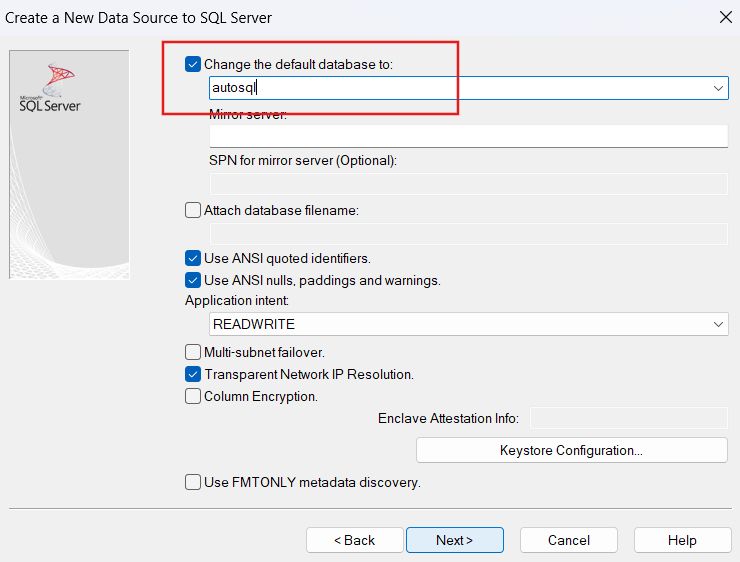
3. Change the default database. The drop down might not work because of limited access, but you can type in the database name manually. Keep the rest to the defaults or change them according to your needs.
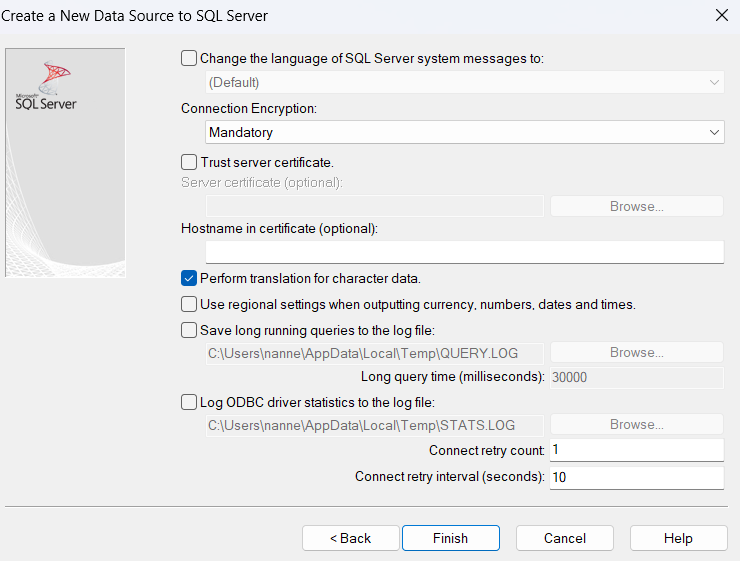
4. You can also keep the defaults in the last screen, and click 'Finish'
When you click finish, and the connection was succesful, the resulting connection string is inserted into AutoSQL:
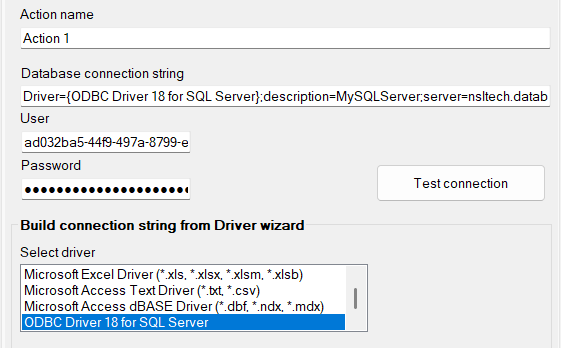
Hit ‘Test connection’ to get a final confirmation that everything is working. Did it not work? Please reach out to our support!
All other steps are the same as with other databases. You can find more details on these here (skip step 1): Scheduling a SQL query in 3 steps